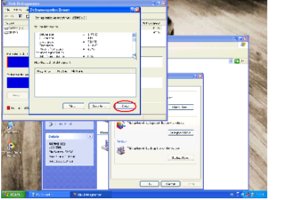
- To access defragmenter open “My Computer” and right click on the drive to be defragmented
- Select “properties”
- Then select “Tools”
- Then select “Defragment Now”
- Click “analyze” button. This will analyze the amount of fragmentation.
- A report indicating if defragmenter needs to be run will be displayed
- Defragmenter can still be run, although the report says it is not required
- When complete a report can be viewed by selecting “View Report”
- After viewing the report the utility can be closed. As part of a regular routine, defragmenter should be run on all drives once a fortnight.
Disk Clean Up
- To access Disk Cleanup open “My Computer” and right click the drive to be cleaned then select “Properties”
- Next select “Disk Cleanup”
- Tick the items to be removed
- Select “Yes” to confirm deletion of the files
- The files will then be removed from the hard drive
- The space is now returned to the hard drive. Click “OK” to finish
Favourites
- To access your favourites open “Internet Explorer”
- When Internet Explorer opens select “Favourites”
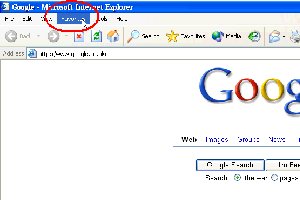
- When selected, a drop down list of all favourites will be displayed
- Select “Organise Favourites”
- Firstly we will delete an item that is no longer required
- Select the item, then click “delete”
- Select “Yes” to confirm deletion
- The item will been sent to the recycle bin.
- Select “Create Folder” to start organising favourites
- Select “Rename” and give the new folder a name i.e. “computers”
- There are two ways to move items in to folders.
- Select an item then click “Move to Folder”
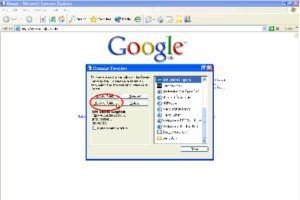
- Now select the folder and the item is moved into the folder.
- OR use drag and drop
- Left click the item and hold, then drag to the folder
- The black line indicates the position where the item will be placed
- When in the correct place release the mouse button, the item has now been moved to its new folder
- With folders created, and items moved, the favourites is now easier to navigate.
- Select a folder to view its contents
Files and Folders
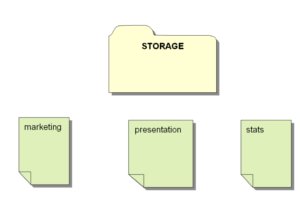
- In this scenario we have a folder called “storage” containing different files – double click on the folder “storage”.
- Inside the folder three files can be seen
- Below is a graphical representation of how this file/folder structure is organise
- Once inside the folder the files can be viewed in different formats depending on your preference – Click on “View” and select “Thumbnails”
- Here the files are viewed as thumbnails – again click on “View”
- Next select “List”
- Here the files are viewed as a list format – click “View”
- Next select “Details”
- Here the files are viewed in the details format which gives a more descriptive view and properties of each file – Click on “View”
- Select “Arrange Icons by” and choose “Name”
- Here the files are arranged alphabetically by order of name. Click “View”
- Select “Arrange Icons by” and choose “Type”
- Here the files are arranged by type i.e. all Word files will be grouped together, all PowerPoint together etc – again click “View”
- Select “Arrange Icons by” and choose “Modified”
- Here the files are displayed in date and time order of when they last were edited.
- Next select “View” then “Arrange Icons by” and “Show in Groups”
- Now the files are displayed alphabetically, regardless of file type, this is particularly useful when large numbers of files are stored in a folder.
- Another way of viewing files and folders is through “Windows Explorer”. To locate select “Start”
- Select “All Programs”
- Select “Accessories” and next “Windows Explorer”
- From the left-hand pane the folder “storage” can be found. Then double click
- Once open the files can be viewed in the right hand window
- Microsoft have also provided a convenient location for you to store your files, this is known as the “My Documents” folder – click on “Start”
- Select “My Documents”- Here a drop down view of the contents of the folder can be seen
- For a more detailed view – right click “My Documents” and select Open”
- The contents can now be viewed more clearly and in detail.
- Another useful folder that is provided is the “My Pictures” folder – click “Start” and select “My Pictures”
- Here your electronic photo album can be viewed
- Here the pictures can be viewed in the same way as normal files but with some extra features- click “View” and select “Filmstrip”, photos can be selected and be viewed in more detail in the centre of the screen
- Another added feature is the “Pictures Taken On” view, this allows photos to be organised by date & time from when the original photos were taken from a digital camera or photo camera
- The easiest way to view your photo album is by the slide show as this method allows you to view pictures full screen without any user intervention – In the left hand pane click “View as a slide show”
- And the slide show will begin….
- ….and will carry on automatically
- The slide show can then be stopped by placing the mouse cursor over the screen and clicking on the cross in the top right hand corner
Recycle Bin
- How to recover a file from the recycle bin e.g. The “my music folder” will be deleted and then recovered
- Right click the “my music” folder and select “delete”
- Select yes to confirm deletion
- The file has now been sent to the recycle bin. To recover this file, Right click the recycle bin and select “open”.
- Highlight (single left click) the file to be recovered
- Note the task box on the left changes from “restore all items” to “restore this item”. With the file highlighted select “restore this item”
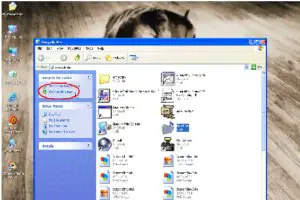
- When clicked the file is restored to its original location.
- With the file recovered, the recycle bin can be emptied to remove the unwanted files. Right click the recycle bin and select “empty recycle bin”
- Select yes to confirm deletion of the files
- The recycle bin is now empty; the bin should be emptied on a regular basis, once per week, as up to 10% of the hard disk space is allocated for storage of deleted files.
- A lot of valuable disk space can be saved by routinely emptying the recycle bin. The recycle bin should be emptied before running defragmenter so free space can be reused.
- To access scandisk open “My Computer” and right click on the drive that you want scanned. Select “Properties”
- From the tools tab under “Error Checking” select “Check Now”
- Two options are available to check
- the file system
- or the disk
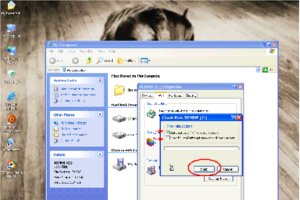
- Click “Start” to begin Phase 1.
- After phase 1 “file system check” has completed click “OK” to finish,
- Then start the disk check by ticking “Scan for and attempt to recover bad sectors.”
- Then click “Start”
- This is a two phase operation and may take sometime to complete
- When complete click “OK” to finish
- And “OK” to close Scandisk.
- Like Defragmenter, Scandisk should be run on a regular basis to ensure the file system and hard disk are maintained to their optimum.
Temporary Internet Files and Cookies
- To delete temporary internet files and cookies, right click “Internet Explorer” and select “Properties”
- Then in the Temporary Internet files section, select “Delete Files”

- Select “OK” to confirm deletion of the files
- Next select “Delete Cookies”
- For help on any item that shows on this page click the “?”, then click the item.
- Click “OK” to confirm deletion of these files
- For privacy purposes the history of websites visited can also be cleared by clicking “Clear History”
- Click “Yes” to confirm deletion of these files
Antivirus Software
- To start click the desktop icon
- On the opening screen select “Check for Updates”, always make certain the latest update has been installed.
- Scanner will connect to the internet and download available updates
- Updates may include new virus updates and new components
- Select “Update” to download and install the new files
- When the download completes all files will be automatically updated
- Select “OK” to finish the updates
- Now everything is up to date a scan can be run. Select “Scan Computer” to begin
- The scan may take some time to complete
- A summary of the scan is displayed on completion, in this case no viruses were found
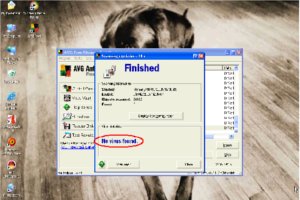
- Keeping the virus scanner updated can be automated so there is less chance of updates being missed or forgotten.
- This can be scheduled at start-up or a set time of day when the computer will be connected to the internet. This requires schedule to be set up, select “Scheduler”.
- Highlight “Update Plan” then select “Edit Schedule”
- Select the most suitable time from the drop down menu
- Also tick “If Internet connection is not available, check when it goes online”
- With both options selected, if the computer is not on at the scheduled time it will update when the internet becomes available. Select “OK” to set the new schedule.
- All files that are to be loaded onto the computer from other sources e.g. floppy discs, downloaded documents and attachments should always be scanned before you open them.
- Even if these files are received from family and friends, better safe than sorry.
- People may not realise they have a virus on their computer.
- A file is about to be opened off a floppy disc. Before the file is opened, right click on the drive then select “Scan with ….”
- The disc will be scanned ensuring no viruses are transferred to the system.
- If the scan finds no infected files the disc can be safely opened. Click “Close to finish”
- Always remember better safe than sorry.
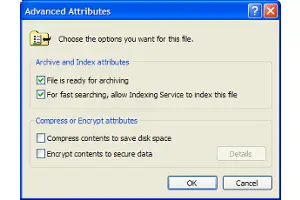 This is the window seen when encrypting or compressing a file. The corresponding window for a folder is very similar.
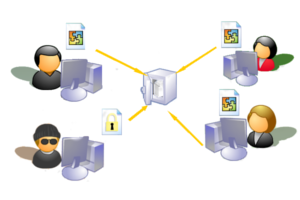 NTFS File Permissions